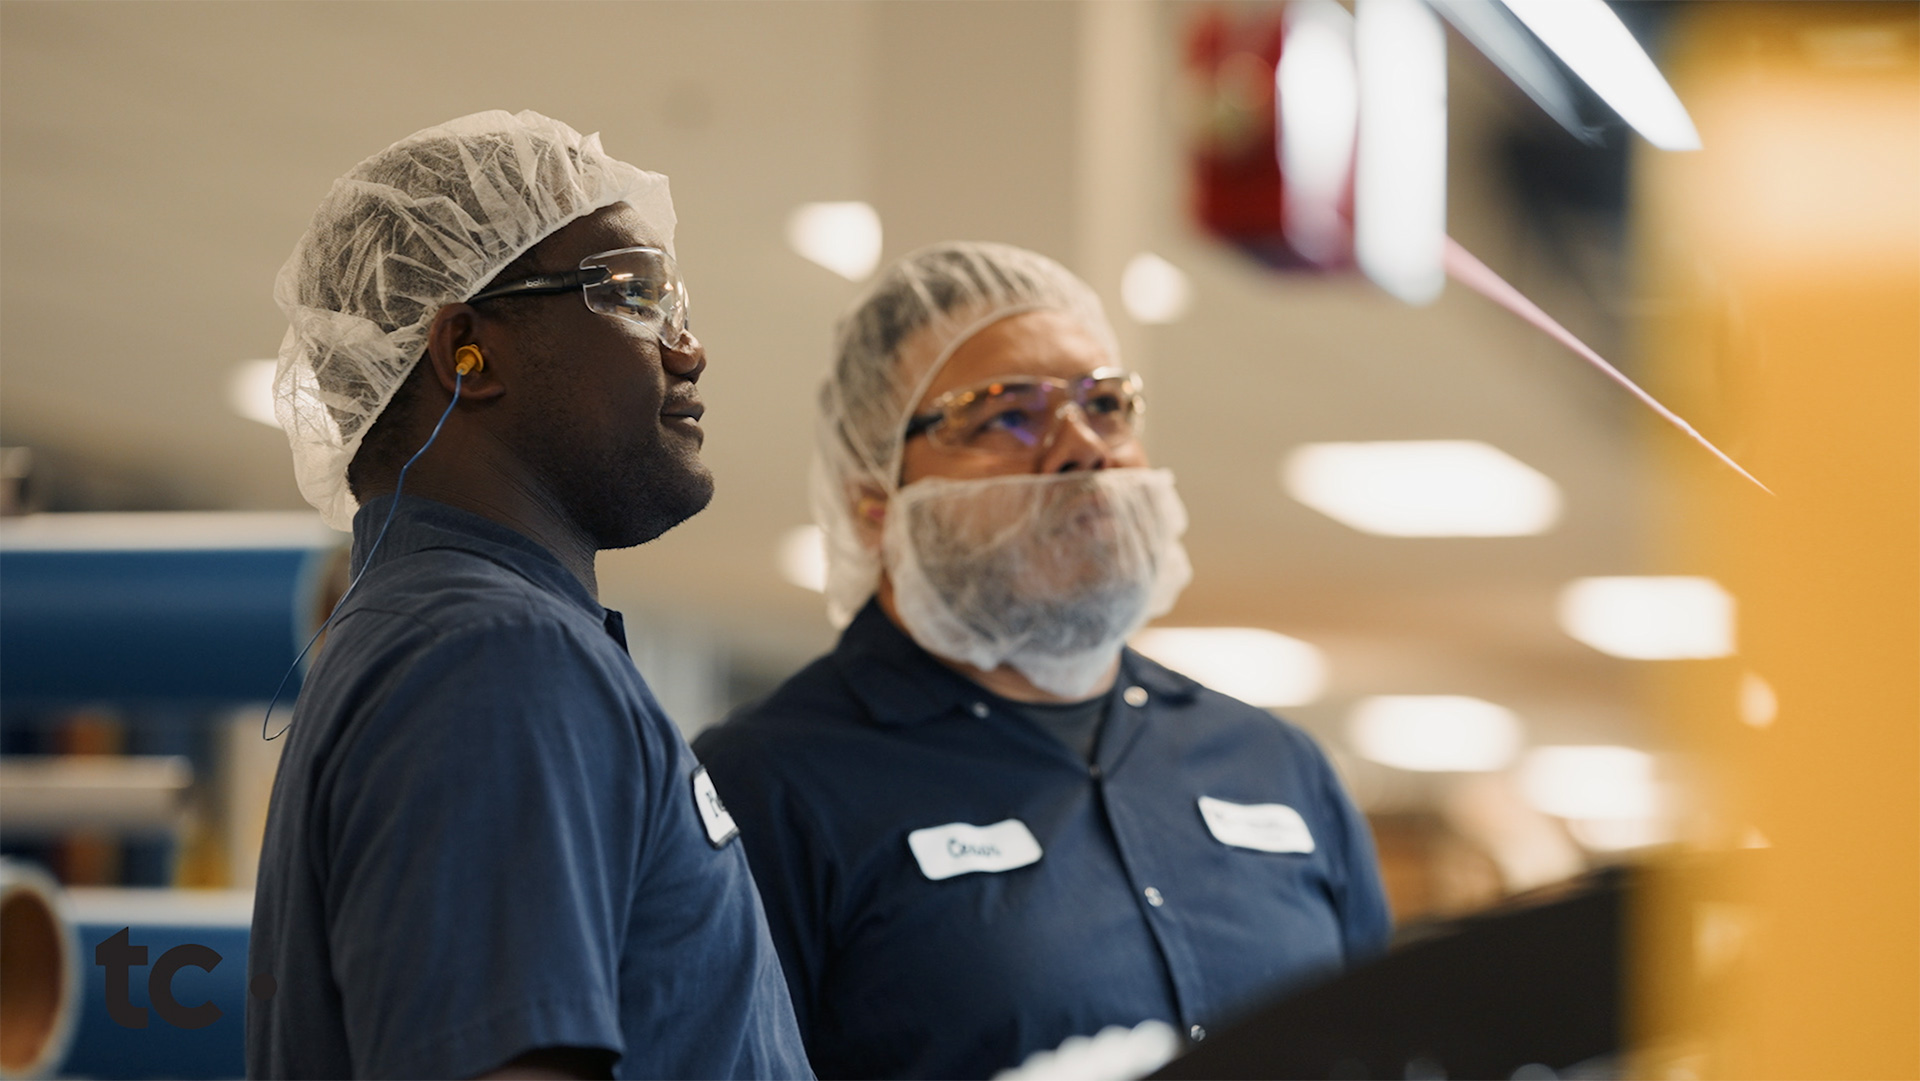
Win a 25-day Enrichment Voyage aboard the MV Explorer and take your favorite person along for the ride? Seriously? Where do I sign up??
I have so enjoyed reading about Kristin's world travels, and her and her sister's stints in the Enrichment/Semester at Sea programs. I've even checked it out for my high schooler as he makes plans for the coming years. But now? Can it be? Is she really offering passage for two people as a promo on her blog? How awesome!!!
The itinerary looks amazing - 4 weeks through Central and South America and the Caribbean, more specifically: Nassau, Bahamas; Montego Bay, Jamaica; Cartagena, Colombia; Colon, Panama; Guayaquil, Ecuador; Callao, Peru; Manta, Ecuador; Puntarenas, Costa Rica; Corinto, Nicaragua; Puerto Quetzal, Guatemala; Cabo San Lucas, Mexico; and San Diego, California. A-Maz-ING!
For more details on this giveaway (do I want to share this? Will it lower my odds of winning??) check out Kristen's latest post. For more information on the Enrichment At Sea programs, check out Enrichment Voyages website.
Wednesday, August 1, 2012
Tuesday, March 22, 2011
My Biscuit Jocande Imprime Entremet
My January Daring Baker Challenge - posted in late March! :-O Oh my goodness..... I'm so beyond late in posting this. But, believe it or not, it was completed in January - Just ask Amy & Sean who enjoyed this with us, this dessert was completed and consumed months ago! :) I'm just a wee bit behind on my blogging.
The January 2011 Daring Bakers’ challenge was hosted by Astheroshe of the blog accro. She chose to challenge everyone to make a Biscuit Joconde Imprime to wrap around an Entremets dessert. And this process is a doozy! It's quite fun to put together, but, being my first time doing this, there were a few lessons learned. For one, make sure that the diameter of your dessert is smaller, or that the height of your biscuit joconde is not as high as mine! The sheer volume of space that I had to fill was more than I could manage! Hopefully you'll see what I'm talking about as we work through the process....
Joconde Sponge
YIELD: Two ½ size sheet pans or a 13” x 18” (33 x 46 cm) jelly roll pan
(NOTE - this is far more than you will need - I made a half batch and still had plenty left over)
Ingredients:
¾ cup/ 180 ml/ 3oz/ 85g almond flour/meal - *You can also use hazelnut flour, just omit the butter
½ cup plus 2 tablespoons/ 150 ml/ 2⅔ oz/ 75g confectioners' (icing) sugar
¼ cup/ 60 ml/ 1 oz/ 25g cake flour *See note below
3 large eggs - about 5⅓ oz/ 150g
3 large egg whites - about 3 oz/ 90g
2½ teaspoons/ 12½ ml/ ⅓ oz/ 10g white granulated sugar or superfine (caster) sugar
2 tablespoons/ 30 ml/ 1oz / 30g unsalted butter, melted
Directions:
1.In a clean mixing bowl whip the egg whites and white granulated sugar to firm, glossy peeks. Reserve in a separate clean bowl to use later.
2.Sift almond flour, confectioner’s sugar, cake flour. (This can be done into your dirty egg white bowl)
3.On medium speed, add the eggs a little at a time. Mix well after each addition. Mix until smooth and light. (If using a stand mixer use blade attachment. If hand held a whisk attachment is fine, or by hand. )
4.Fold in one third reserved whipped egg whites to almond mixture to lighten the batter. Fold in remaining whipped egg whites. Do not over mix.
5.Fold in melted butter.
6.Reserve batter to be used later.
Patterned Joconde-Décor Paste
(Note: I opted for the cocoa variation - again, far more than you would need for a large single dessert)
YIELD: Two ½ size sheet pans or a 13” x 18” (33 x 46 cm) jelly roll pan
Ingredients
14 tablespoons/ 210ml/ 7oz/ 200g unsalted butter, softened
1½ cups plus1½ tablespoons/ 385ml/ 7oz/ 200g Confectioners' (icing) sugar
7 large egg whites - about 7 oz / 200g
1¾ cup/ 420ml/ 7¾ oz/ 220g cake flour
Food coloring gel, paste or liquid
COCOA Décor Paste Variation: Reduce cake flour to 6 oz / 170g. Add 2 oz/ 60 g cocoa powder. Sift the flour and cocoa powder together before adding to creamed mixture.
Directions:
1.Cream butter and sugar until light and fluffy (use stand mixer with blade, hand held mixer, or by hand)
2.Gradually add egg whites. Beat continuously.
3.Fold in sifted flour.
4.Tint batter with coloring to desired color, if not making cocoa variation.
Preparing the Joconde- How to make the pattern:
1.Spread a thin even layer of décor paste approximately 1/4 inch (5 millimeter) thick onto silicone baking mat with a spatula, or flat knife. Place mat on an upside down baking sheet. The upside down sheet makes spreading easier with no lip from the pan.
2.Pattern the décor paste – Here is where you can be creative. Make horizontal /vertical lines (you can use a knife, spatula, cake/pastry comb). Squiggles with your fingers, zig zags, wood grains. Be creative whatever you have at home to make a design can be used. OR use a piping bag. Pipe letters, or polka dots, or a piped design. If you do not have a piping bag. Fill a ziplock bag and snip off corner for a homemade version of one.

3.Slide the baking sheet with paste into the freezer. Freeze hard. Approx 15 minutes.
4.Remove from freezer. Quickly pour the Joconde batter over the design. Spread evenly to completely cover the pattern of the Décor paste.
5.Bake at 475ºF /250ºC until the joconde bounces back when slightly pressed, approx. 15 minutes. You can bake it as is on the upside down pan. Yes, it is a very quick bake, so watch carefully.
6.Cool. Do not leave too long, or you will have difficulty removing it from mat.
7.Flip cooled cake on to a powdered sugared parchment paper. Remove silpat. Cake should be right side up, and pattern showing! (The powdered sugar helps the cake from sticking when cutting.)
Preparing the MOLD for entremets:
Start with a large piece of parchment paper laid on a very flat baking sheet. Then a large piece of cling wrap over the parchment paper. Place a spring form pan ring, with the base removed, over the cling wrap and pull the cling wrap tightly up on the outside of the mold. Line the inside of the ring with a curled piece of parchment paper overlapping top edge by ½ inch. CUT the parchment paper to the TOP OF THE MOLD. It will be easier to smooth the top of the cake.
3.Once your height is measured, then you can cut the cake into equal strips, of height and length. (Use a very sharp paring knife and ruler.)
5.The mold is done, and ready to fill.
The January 2011 Daring Bakers’ challenge was hosted by Astheroshe of the blog accro. She chose to challenge everyone to make a Biscuit Joconde Imprime to wrap around an Entremets dessert. And this process is a doozy! It's quite fun to put together, but, being my first time doing this, there were a few lessons learned. For one, make sure that the diameter of your dessert is smaller, or that the height of your biscuit joconde is not as high as mine! The sheer volume of space that I had to fill was more than I could manage! Hopefully you'll see what I'm talking about as we work through the process....
Joconde Sponge
YIELD: Two ½ size sheet pans or a 13” x 18” (33 x 46 cm) jelly roll pan
(NOTE - this is far more than you will need - I made a half batch and still had plenty left over)
Ingredients:
¾ cup/ 180 ml/ 3oz/ 85g almond flour/meal - *You can also use hazelnut flour, just omit the butter
½ cup plus 2 tablespoons/ 150 ml/ 2⅔ oz/ 75g confectioners' (icing) sugar
¼ cup/ 60 ml/ 1 oz/ 25g cake flour *See note below
3 large eggs - about 5⅓ oz/ 150g
3 large egg whites - about 3 oz/ 90g
2½ teaspoons/ 12½ ml/ ⅓ oz/ 10g white granulated sugar or superfine (caster) sugar
2 tablespoons/ 30 ml/ 1oz / 30g unsalted butter, melted
Directions:
1.In a clean mixing bowl whip the egg whites and white granulated sugar to firm, glossy peeks. Reserve in a separate clean bowl to use later.
2.Sift almond flour, confectioner’s sugar, cake flour. (This can be done into your dirty egg white bowl)
3.On medium speed, add the eggs a little at a time. Mix well after each addition. Mix until smooth and light. (If using a stand mixer use blade attachment. If hand held a whisk attachment is fine, or by hand. )
4.Fold in one third reserved whipped egg whites to almond mixture to lighten the batter. Fold in remaining whipped egg whites. Do not over mix.
5.Fold in melted butter.
6.Reserve batter to be used later.
Patterned Joconde-Décor Paste
(Note: I opted for the cocoa variation - again, far more than you would need for a large single dessert)
YIELD: Two ½ size sheet pans or a 13” x 18” (33 x 46 cm) jelly roll pan
Ingredients
14 tablespoons/ 210ml/ 7oz/ 200g unsalted butter, softened
1½ cups plus1½ tablespoons/ 385ml/ 7oz/ 200g Confectioners' (icing) sugar
7 large egg whites - about 7 oz / 200g
1¾ cup/ 420ml/ 7¾ oz/ 220g cake flour
Food coloring gel, paste or liquid
COCOA Décor Paste Variation: Reduce cake flour to 6 oz / 170g. Add 2 oz/ 60 g cocoa powder. Sift the flour and cocoa powder together before adding to creamed mixture.
Directions:
1.Cream butter and sugar until light and fluffy (use stand mixer with blade, hand held mixer, or by hand)
2.Gradually add egg whites. Beat continuously.
3.Fold in sifted flour.
4.Tint batter with coloring to desired color, if not making cocoa variation.
Preparing the Joconde- How to make the pattern:
1.Spread a thin even layer of décor paste approximately 1/4 inch (5 millimeter) thick onto silicone baking mat with a spatula, or flat knife. Place mat on an upside down baking sheet. The upside down sheet makes spreading easier with no lip from the pan.
2.Pattern the décor paste – Here is where you can be creative. Make horizontal /vertical lines (you can use a knife, spatula, cake/pastry comb). Squiggles with your fingers, zig zags, wood grains. Be creative whatever you have at home to make a design can be used. OR use a piping bag. Pipe letters, or polka dots, or a piped design. If you do not have a piping bag. Fill a ziplock bag and snip off corner for a homemade version of one.

3.Slide the baking sheet with paste into the freezer. Freeze hard. Approx 15 minutes.
4.Remove from freezer. Quickly pour the Joconde batter over the design. Spread evenly to completely cover the pattern of the Décor paste.
5.Bake at 475ºF /250ºC until the joconde bounces back when slightly pressed, approx. 15 minutes. You can bake it as is on the upside down pan. Yes, it is a very quick bake, so watch carefully.
6.Cool. Do not leave too long, or you will have difficulty removing it from mat.
7.Flip cooled cake on to a powdered sugared parchment paper. Remove silpat. Cake should be right side up, and pattern showing! (The powdered sugar helps the cake from sticking when cutting.)
Preparing the MOLD for entremets:
Start with a large piece of parchment paper laid on a very flat baking sheet. Then a large piece of cling wrap over the parchment paper. Place a spring form pan ring, with the base removed, over the cling wrap and pull the cling wrap tightly up on the outside of the mold. Line the inside of the ring with a curled piece of parchment paper overlapping top edge by ½ inch. CUT the parchment paper to the TOP OF THE MOLD. It will be easier to smooth the top of the cake.
Preparing the Joconde for Molding:
1.Trim the cake of any dark crispy edges. You should have a nice rectangle shape.
2.Decide how thick you want your “Joconde wrapper”. Traditionally, it is ½ the height of your mold. This is done so more layers of the plated dessert can be shown. However, you can make it the full height.
3.Once your height is measured, then you can cut the cake into equal strips, of height and length. (Use a very sharp paring knife and ruler.)
4.Make sure your strips are cut cleanly and ends are cut perfectly straight. Press the cake strips inside of the mold, decorative side facing out. Once wrapped inside the mold, overlap your ends slightly. You want your Joconde to fit very tightly pressed up to the sides of the mold. Then gently push and press the ends to meet together to make a seamless cake. The cake is very flexible so you can push it into place. You can use more than one piece to “wrap “your mold, if one cut piece is not long enough.
5.The mold is done, and ready to fill.
Because I knew I had some filling issues, I cut a brownie base to fit on the bottom. This gave me a hearty base and filled the first inch or so of the entremet.
Wait! I need more volume! So, I added some vanilla custard.
Then I added the biscuit disk... and still have lots of space to fill.....
so I made some whipped cream.... Which still didn't fill it.... And so I gave up....
My finished Entremet - 2/3rds filled....
The verdict...
The sponge is really just a decorative wrapper, and doesn't have tons of taste, so it's really just about what's inside. And, my "inside" was pretty tasty, if not very fancy, with brownie and vanilla custard. I ended up stressing the most about how to fill the dang thing. The Biscuit Jocande was very fun to make and I would want to do it again sometime. It was absolutely a bit fussy, but in a fun way.
Monday, March 21, 2011
Peanut Butter Cup Ice Cream
I LOVE me some ice cream. It used to be that we always had ice cream in the house. As waist lines expanded though, this was one temptation that we worked (semi-)hard to not have around. So, I stopped buying ice cream. But then, The Farmhouse opened and we were tempted. And I started making ice cream, and lo, we were tempted once more.
I've not made ice cream this winter, but it feels more like spring now, and Jacob made a special request. Being the good mom, I was happy to oblige.
So, I present to you, Peanut Butter Cup Ice Cream!!!
Peanut Butter Cup Ice Cream
oh so easy, and oh so good!!!
Makes 1 Quart
Adapted from The Perfect Scoop, by David Lebovitz
3/4 cup smooth peanut butter*
3/4 cup plus 2 tablespoons sugar
2 2/3 cup half-and-half
Pinch of salt
1/8 teaspoon vanilla extract
6 full sized peanut butter cups, chopped (or smaller mini cups)
Puree the peanut butter, sugar, half-and-half, salt, and vanilla in a blender or food processor until smooth.
Chill the mixture thoroughly in the refrigerator, then freeze it in your ice cream maker according to the manufacturer's instructions.
Fold in chopped peanut butter cups and freeze to cure.
* Peanut Butter - - we, in general, make our own peanut butter with our VitaMix (read, "Best Blender EVER".) For this recipe, I just through in a cup or so of plain peanuts in my VitaMix and blended like crazy till it made the peanut butter. I then added the remaining ice cream ingredients, and blended again, making sure all the peanut butter at the bottom of the mixer was fully incorporated.
This ice cream is GOOD!! Loved it. I think it might also be good with a fudge ripple blended in. But with plenty of peanut butter cups, it really doesn't need much else....
Saturday, January 8, 2011
Pistachio Crème Brûlée
Did I mention I got a Kitchen Torch for Christmas? First on my dishes to make was Creme Brulee! At the New Year's Eve party we attended, our friend, John, shared how the best Creme Brulee he had was a Pistachio Creme Brulee served in New York City. Mike loves pistachio, so I knew I had to try it.
The recipe I opted to go with was found on Rachael Ray's website. I chose roasted, unsalted, pistachios. The ones I purchased were in the shell, to save me a couple pennies. I wont do that again - - it hurts your fingers and takes quite a while to shell a cup's worth of pistachios! I also opted not to freeze, rather just refrigerate for a couple hours, the finished custards.
The overall dish was good - not the best ever though. I wish the pistachio flavor had come out a bit more. Maybe Mike (and I) are just used to pistachio jello pudding mix! :)
Pistachio Crème Brûlée
4 Servings
Prep 20 min (plus standing and freezing)
Bake 50 min
Ingredients:
1 cup plus 2 tablespoons roasted shelled pistachios, toasted
5 tablespoons plus 8 teaspoons sugar
2 cups heavy cream
1 teaspoon pure vanilla extract
1 pinch salt
4 egg yolks
Directions:
1.Position a rack in the middle of the oven and preheat to 300°. Using a food processor, pulse 1 cup pistachios and 5 tablespoons sugar until finely ground.
2.In a saucepan, heat the cream, ground nut mixture, vanilla and salt over medium heat, stirring, until steaming, about 5 minutes. Remove from the heat, cover and let stand for 30 minutes; strain, pressing to extract any cream. Discard the nuts.
3.In a large bowl, beat the egg yolks, then whisk in the pistachio cream. Divide among four 1/2- to 2/3-cup ramekins set in a baking dish. Pour enough warm water into the pan to come halfway up the sides of the ramekins. Bake until the custards are set with a slight jiggle in the center, 45 to 50 minutes.
4.Remove the ramekins from the water bath. Let cool for 30 minutes, then freeze for 1 hour.
5.Just before serving, position an oven rack 2 inches from the broiler and preheat. Sprinkle the custards with the remaining 8 teaspoons sugar. Broil until browned, 3 to 5 minutes. (Alternately, use a kitchen torch to caramelize the sugar.) Chop the remaining 2 tablespoons pistachios and sprinkle on top.
I used demerara sugar - it didn't melt as well as I had hoped. Kind of bumpy rather than smooth. The flavor was good though (even though it looks a little burnt) and it was crispy as it should be.
Weekly Menu - 1/9 - 1/16/2011
My grace is sufficient for you, for my power is made perfect in weakness… For when I am weak, then I am strong. 2 Corinthians 12:9-11,
Monday - Chicken Monterrey, mashed potatoes, broccoli
Tuesday - Baked Salmon II, Simple Herb Rice, tossed salad
Wednesday - Spicy Beef Vegetable Soup, Homemade bread
Thursday - Meatball Subs
Friday - Make Your Own Pizzas
Saturday - Hot & Sour Soup
Tuesday - Baked Salmon II, Simple Herb Rice, tossed salad
Wednesday - Spicy Beef Vegetable Soup, Homemade bread
Thursday - Meatball Subs
Friday - Make Your Own Pizzas
Saturday - Hot & Sour Soup
Tuesday, January 4, 2011
Menu planning is the bomb
Last night, as I stood and washed the dishes from our dinner, I had to pat myself on the back. Here it is, the beginning of 2011, and I feel like I've quite successfully completed a year of stress-free, relatively healthy, home prepared meals for our family to enjoy while sitting around the dinner table together each evening. All of this while still working a full time job, with more than a hour round trip commute. Mike joined in and pat me on the back too!!!
Have I ever mentioned that menu planning has, quite literally, changed my life?
Wind the clock back a year or two.....
Each evening I would call Mike as I left the office to let him know I was on my way home. He would inevitably ask what was for dinner. I, of course, had no clue and could offer no good answers. And not only did I have no clue, but I was tired after a long days work, and stressed. My family had been home since 3 or 4pm, and were getting hungry. If I wanted anything other than take-out, it would take another hour or so to get our dinner ready, and everyone (especially me) would be frustrated and even more hungry. What made it worse was that I actually LIKED to cook - - I just felt that my family had no patience for me to actually take time to prepare the meal.
Enter my (cue heavenly music - AHHHHHHH) revelation - - a meal plan!
This wasn't rocket science, but I had never ever put it together. Why?!!!
So - here's how it works - - My family and I actually sit down, usually Saturday morning, and together come up with ideas for the meals for the coming week. Based on those ideas, I put together a menu for the week, and make up a grocery list. Each week my family has input. They don't necessarily have the final say (good grief - we can't have tacos and pizza every night!) but, because the menu is written down, they can look and see that maybe 'Tuesday's meal' isn't their favorite, but at least they know what to expect, and can maybe look forward to their favorite on Wednesday. Surprisingly, this, for my boys, has worked remarkably well. And, for some reason, it's seemed to make them more open to try new dishes - perhaps knowing that their old favorite will be back tomorrow.
Menu planning, or writing it down, was the first, and crucial step. The second step was finding a way to prepare the meal and get it on the table in a timely manner. Making a home made meal still means that you have to allow time to prepare it.
Zach gets on the bus at a ridiculous hour of the morning - 6:10am!!! Because of this, I'm up before 6, making sure he's getting out of the shower and onto his bus. Between 6 and 7am I have "time." I spend that time prepping for the evening meal. Depending on the meal this might take 5 minutes, or a full hour. Sometimes it's pulling out the meat to defrost and marinate, sometimes it's chopping veggies, browning meat, or making rice or mashed potatoes, throwing stuff in the crock pot, or sometimes it's fully assembling the dish, and putting it in the fridge to bake when Mike gets home. I have learned that a remarkable amount of the prep work can be done in the morning, and you would not be able to tell that it wasn't prepared moments before putting it on the table. With this method, nearly all my meals are served within 20 minutes of me walking in the door each evening. And everything is simple - it's all been thought out and takes little effort.
Following is a sample of how prepping ahead works on a menu:
Some of the benefits that we've been able to claim as a result of meal planning:
1- Lower grocery bill - We know what we need to buy to feed our family for the week, and we stick to the list. We end up wasting less food (money) impulse buying something that looks or sounds good thinking that maybe we'll make it later this week, only to forget about it, or not make the time while it goes bad in the back of the fridge.
2 - I get to try new recipes! As I mentioned, I like to cook!! I've made a bit of a pact with my boys that there wont be more than one new dish a week, but now I know I can do it. They agree that it doesn't have to be their favorite, and we decide if it will show up in the rotation again.
3 - Sitting down to eat happens pretty quickly after I get home, and clean up is faster since half of it was done when I prepped the food in the morning. Both of these translate to more family time each evening.
4 - We have precious family time around the table, and studies have shown that this amounts to healthier kids, lower substance abuse, better grades, and stronger parent child relationships.
5 - We eat healthier - less fast food!
6 - We save money - less eating out!
7 - The family gets involved. Often Mike, and occasionally the boys, will do the last prep steps of the meal while I drive home. I'm hoping this will translate to my boys being more comfortable in the kitchen and preparing their own meals as they get older.
8 - I am happier and less stressed. And, as a result, my family is happier when I'm happier!
Family meal planning - it's 'da bomb, and it's changed my life!
Have I ever mentioned that menu planning has, quite literally, changed my life?
Wind the clock back a year or two.....
Each evening I would call Mike as I left the office to let him know I was on my way home. He would inevitably ask what was for dinner. I, of course, had no clue and could offer no good answers. And not only did I have no clue, but I was tired after a long days work, and stressed. My family had been home since 3 or 4pm, and were getting hungry. If I wanted anything other than take-out, it would take another hour or so to get our dinner ready, and everyone (especially me) would be frustrated and even more hungry. What made it worse was that I actually LIKED to cook - - I just felt that my family had no patience for me to actually take time to prepare the meal.
Enter my (cue heavenly music - AHHHHHHH) revelation - - a meal plan!
This wasn't rocket science, but I had never ever put it together. Why?!!!
So - here's how it works - - My family and I actually sit down, usually Saturday morning, and together come up with ideas for the meals for the coming week. Based on those ideas, I put together a menu for the week, and make up a grocery list. Each week my family has input. They don't necessarily have the final say (good grief - we can't have tacos and pizza every night!) but, because the menu is written down, they can look and see that maybe 'Tuesday's meal' isn't their favorite, but at least they know what to expect, and can maybe look forward to their favorite on Wednesday. Surprisingly, this, for my boys, has worked remarkably well. And, for some reason, it's seemed to make them more open to try new dishes - perhaps knowing that their old favorite will be back tomorrow.
Menu planning, or writing it down, was the first, and crucial step. The second step was finding a way to prepare the meal and get it on the table in a timely manner. Making a home made meal still means that you have to allow time to prepare it.
Zach gets on the bus at a ridiculous hour of the morning - 6:10am!!! Because of this, I'm up before 6, making sure he's getting out of the shower and onto his bus. Between 6 and 7am I have "time." I spend that time prepping for the evening meal. Depending on the meal this might take 5 minutes, or a full hour. Sometimes it's pulling out the meat to defrost and marinate, sometimes it's chopping veggies, browning meat, or making rice or mashed potatoes, throwing stuff in the crock pot, or sometimes it's fully assembling the dish, and putting it in the fridge to bake when Mike gets home. I have learned that a remarkable amount of the prep work can be done in the morning, and you would not be able to tell that it wasn't prepared moments before putting it on the table. With this method, nearly all my meals are served within 20 minutes of me walking in the door each evening. And everything is simple - it's all been thought out and takes little effort.
Following is a sample of how prepping ahead works on a menu:
- Monday - Hot and Sweet Chicken - Make rice in morning, allow to cool then cover and refrigerate. Throw chicken and sauce in crock pot. In evening, warm rice in microwave (3 minutes), steam broccoli in microwave (3 minutes), plate the chicken. Dinner is served in less than 10 minutes!
- Tuesday - Chicken Lo Mien - - get everything chopped and ready to go in morning, stir fry and make noodles when I get home. Dinner is served in 20 minutes!
- Wednesday - Hamburgers on the grill - - cold veggies chopped, and hamburger "patti'ed up" in the morning, ready to throw on the grill. Dinner is served in 10 minutes!
- Thursday - Sausage Pepper & Potato bake - - sausage and potato browned, peppers and onions quick stir fry, and all are placed in baking dish. Pan deglazed with wine and chicken stock and and then put in separate plastic container. Bread put in bread maker. In the evening, Mike adds sauce to baking dish in places in the oven. If all goes as planned, dinner is ready (thanks to Mike and the breadmaker) when I walk in the door!
- Friday - Make your own pizza - - spend 5 minutes making the dough when I walk in the door, letting it rise while I change clothes and settle in. Then we all gather to begin making our own pizzas 20 minutes later. This one is a family affair. It takes longer to get dinner on the table, but we all get to enjoy the process!
Some of the benefits that we've been able to claim as a result of meal planning:
1- Lower grocery bill - We know what we need to buy to feed our family for the week, and we stick to the list. We end up wasting less food (money) impulse buying something that looks or sounds good thinking that maybe we'll make it later this week, only to forget about it, or not make the time while it goes bad in the back of the fridge.
2 - I get to try new recipes! As I mentioned, I like to cook!! I've made a bit of a pact with my boys that there wont be more than one new dish a week, but now I know I can do it. They agree that it doesn't have to be their favorite, and we decide if it will show up in the rotation again.
3 - Sitting down to eat happens pretty quickly after I get home, and clean up is faster since half of it was done when I prepped the food in the morning. Both of these translate to more family time each evening.
4 - We have precious family time around the table, and studies have shown that this amounts to healthier kids, lower substance abuse, better grades, and stronger parent child relationships.
5 - We eat healthier - less fast food!
6 - We save money - less eating out!
7 - The family gets involved. Often Mike, and occasionally the boys, will do the last prep steps of the meal while I drive home. I'm hoping this will translate to my boys being more comfortable in the kitchen and preparing their own meals as they get older.
8 - I am happier and less stressed. And, as a result, my family is happier when I'm happier!
Family meal planning - it's 'da bomb, and it's changed my life!
Monday, January 3, 2011
Weekly Menu - 1/2 - 1/8/2011
Taste and see that the LORD is good; blessed is the one who takes refuge in him. Psalm 34:8
Monday - Hot & Sweet Chicken
Tuesday - Sausage Pepper Potato Bake
Wednesday - Burgers
Thursday - Pork Chops & Augratin potatoes
Friday - Make your own pizza
Saturday - Hot wings
Going to have to think about making these choices a bit more diet friendly....
Monday - Hot & Sweet Chicken
Tuesday - Sausage Pepper Potato Bake
Wednesday - Burgers
Thursday - Pork Chops & Augratin potatoes
Friday - Make your own pizza
Saturday - Hot wings
Going to have to think about making these choices a bit more diet friendly....
Subscribe to:
Posts (Atom)


